Relay
Instructions for setting up Relay on your Ghost website.

We created Relay to be a plug-and-play newsletter theme with a great user experience. It has all the features you need to run a successful, independent newsletter on Ghost.
Theme Installation
After purchasing the theme, you will be able to download the theme's ZIP file.
Upload the mentioned ZIP file as you would any other Ghost theme:
- Log into your Ghost admin (https://example.com/ghost)
- Find the settings icons on the bottom left and click it
- Find
Themein the menu on the left. - Click
Change theme→Upload theme, and upload the ZIP file. - Click Activate now when prompted.
Next, we will go over customizing the theme and its built-in features.
Theme Options
You can access the custom settings by finding the Design & branding section in the Ghost settings menu. Click on the customize button.
Publication icon, logo, cover and typography
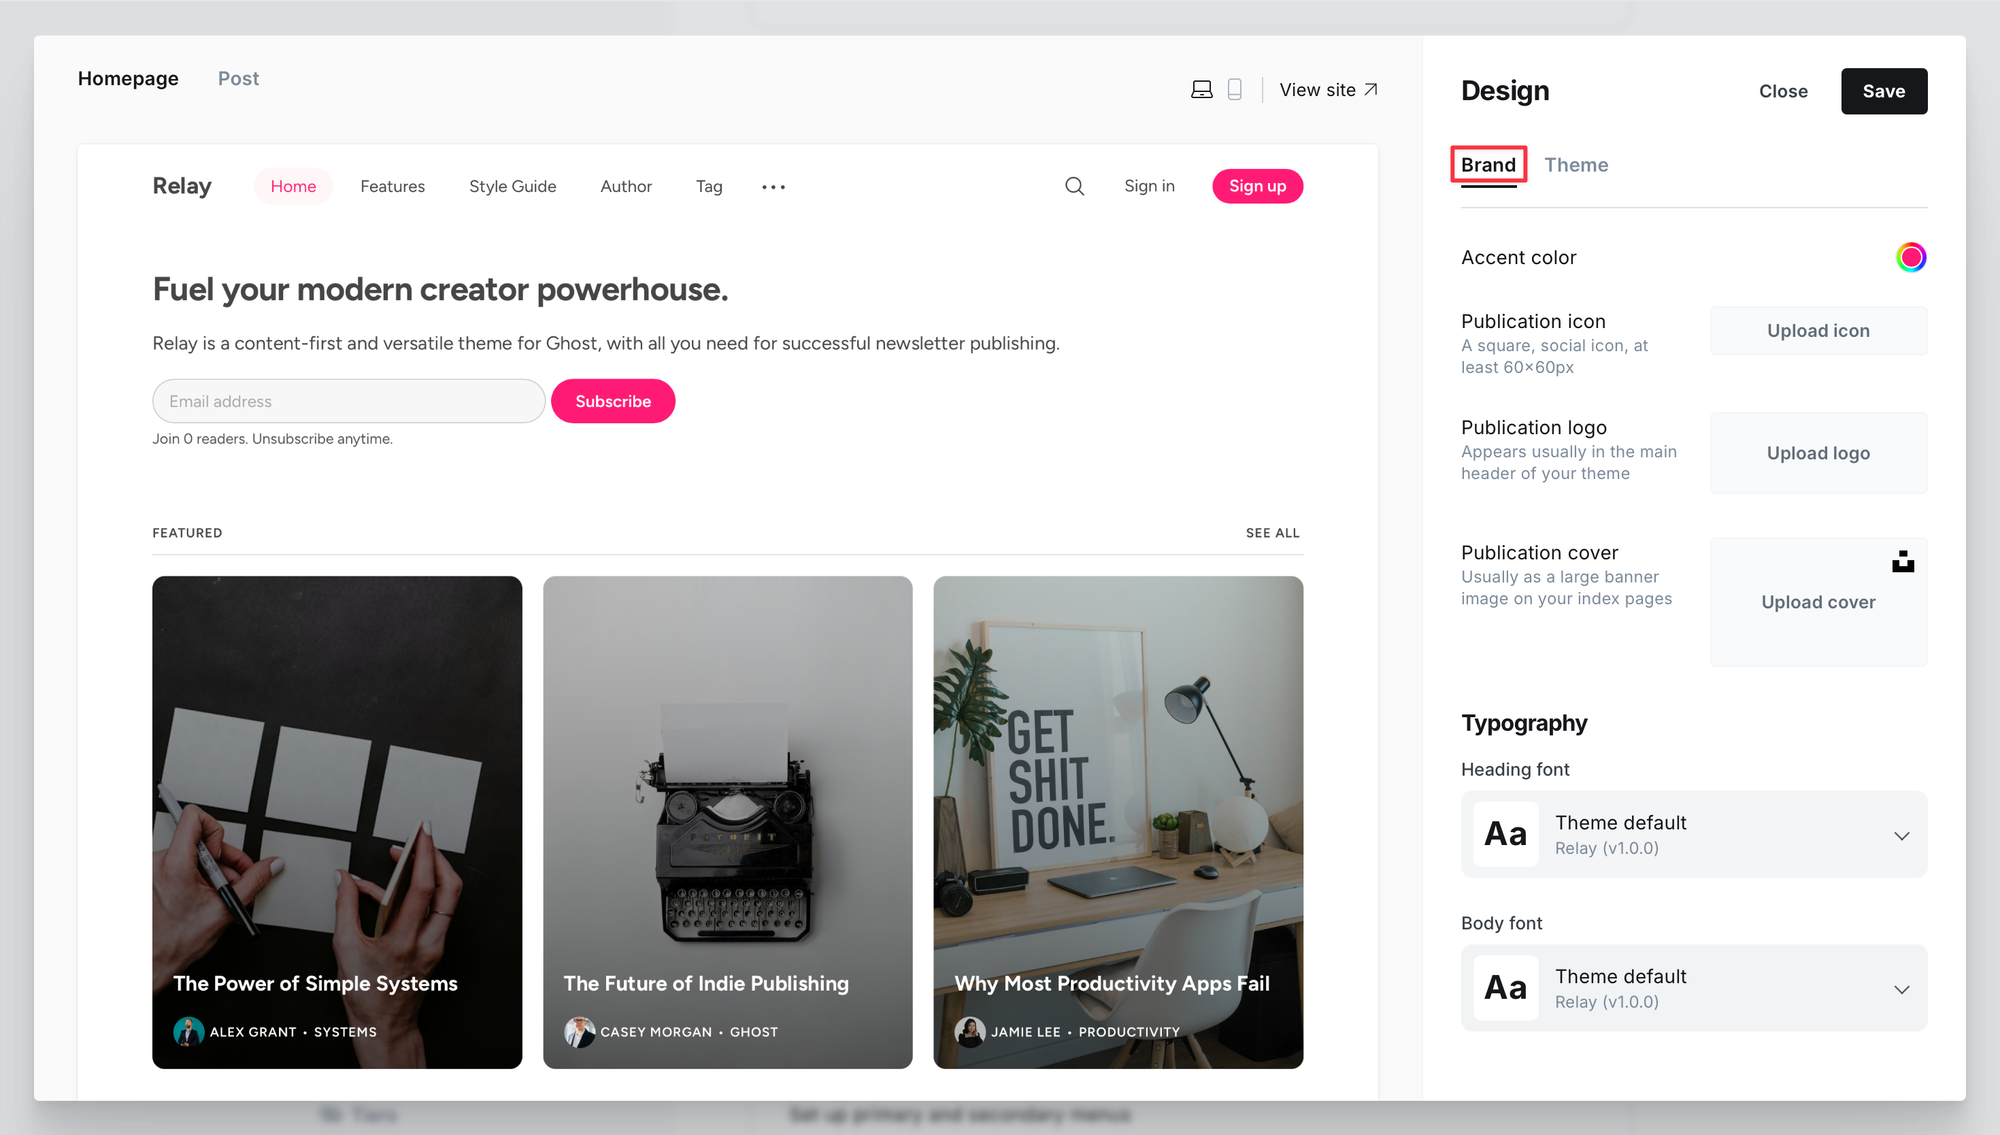
Under the Brand tab, you can set the accent color, icon, logo, and cover.
- Accent color will be displayed all around the theme as a highlight color.
- Icon and logo will be used site-wide to display your brand. Most notably on the left-hand side of the navbar.
- The cover is optional and is displayed as a background of the hero on the homepage. More on this in the next section.
- Under Typography, choose the font to your liking. The theme's default font is called Figtree and is used for both title and body text.
Site wide
To benefit from the theme's options, firstly, click on the Theme tab.
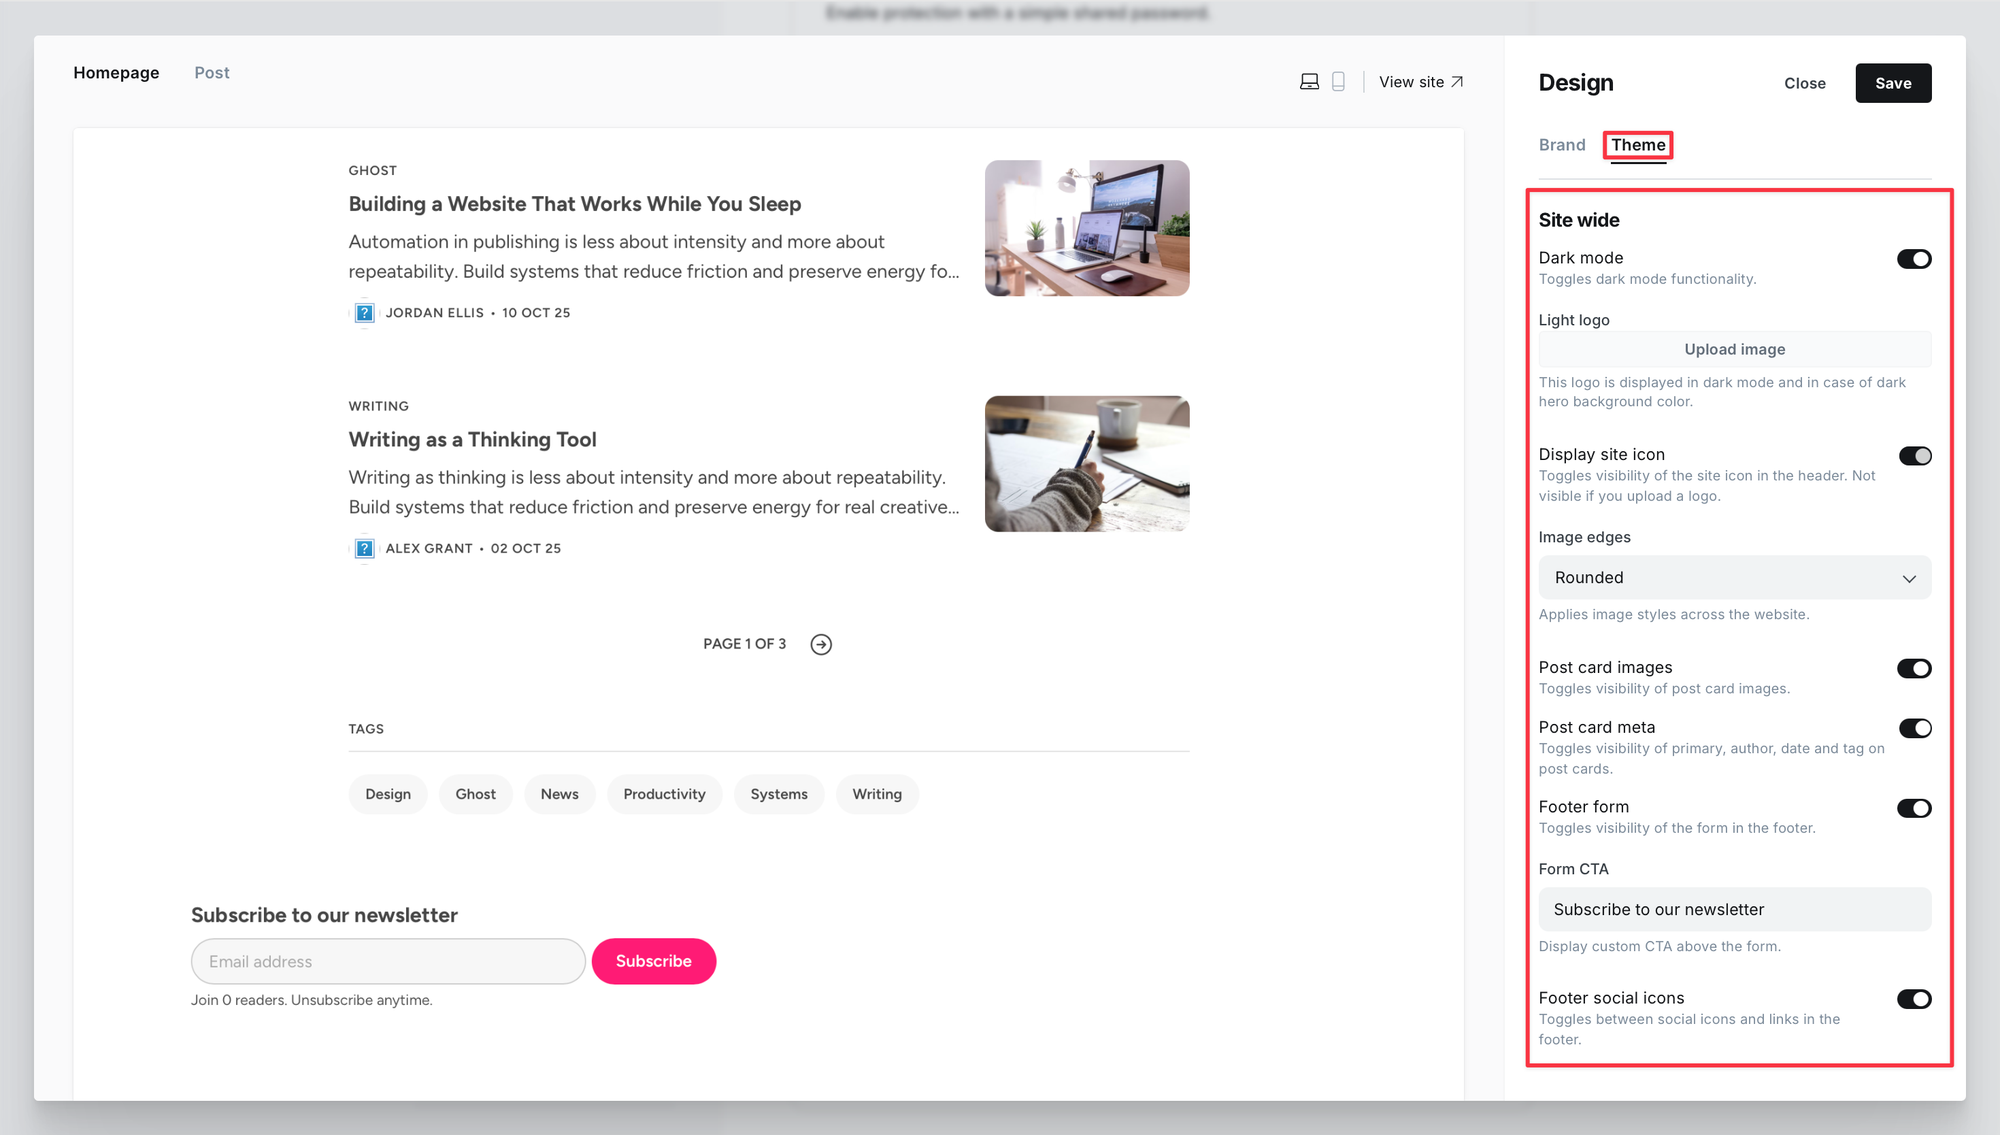
Dark mode
Start by configuring dark mode for the theme. By default, the theme follows the mode set on the visitor’s device. Light for light mode and dark for dark mode. If you only want the light version displayed, switch this to off.
Dark mode logo
If you leave the dark mode functionality on, it’s also recommended to upload a dedicated logo (named "light logo" in the custom settings) to be displayed when the website is in dark mode. Otherwise, your original logo will be displayed. If you're not using a custom logo for your publication, you don’t have to worry about it.
Display site icon
Additionally, there's an option to display the icon next to your site's name. Perfect if you're not using a custom logo.
Images edges
In the next section, decide if you want the images to appear with sharp or rounded edges. This will be applied to images across the website, from post cards, to images within posts.
Post card images and meta
The two toggles just below allow you to decide which information you want to display on post cards:
- Either show or hide post feature images.
- Show or hide post metadata such as author, tag and date.
This is also applied across the entire website.
Footer Form
Toggle the visibility of the footer's form that's visible across all pages. You also have the option to write a custom CTA.
Social icons
In the footer, you can display your social media links as icons. This is also how the secondary navigation is used by default.
If you would like to hide the social icons and display text links instead, toggle this switch to off.
To set up the navigation and thus social icons properly, see the instructions under Navigation.
Homepage
The settings in the second section are applied only to the homepage.
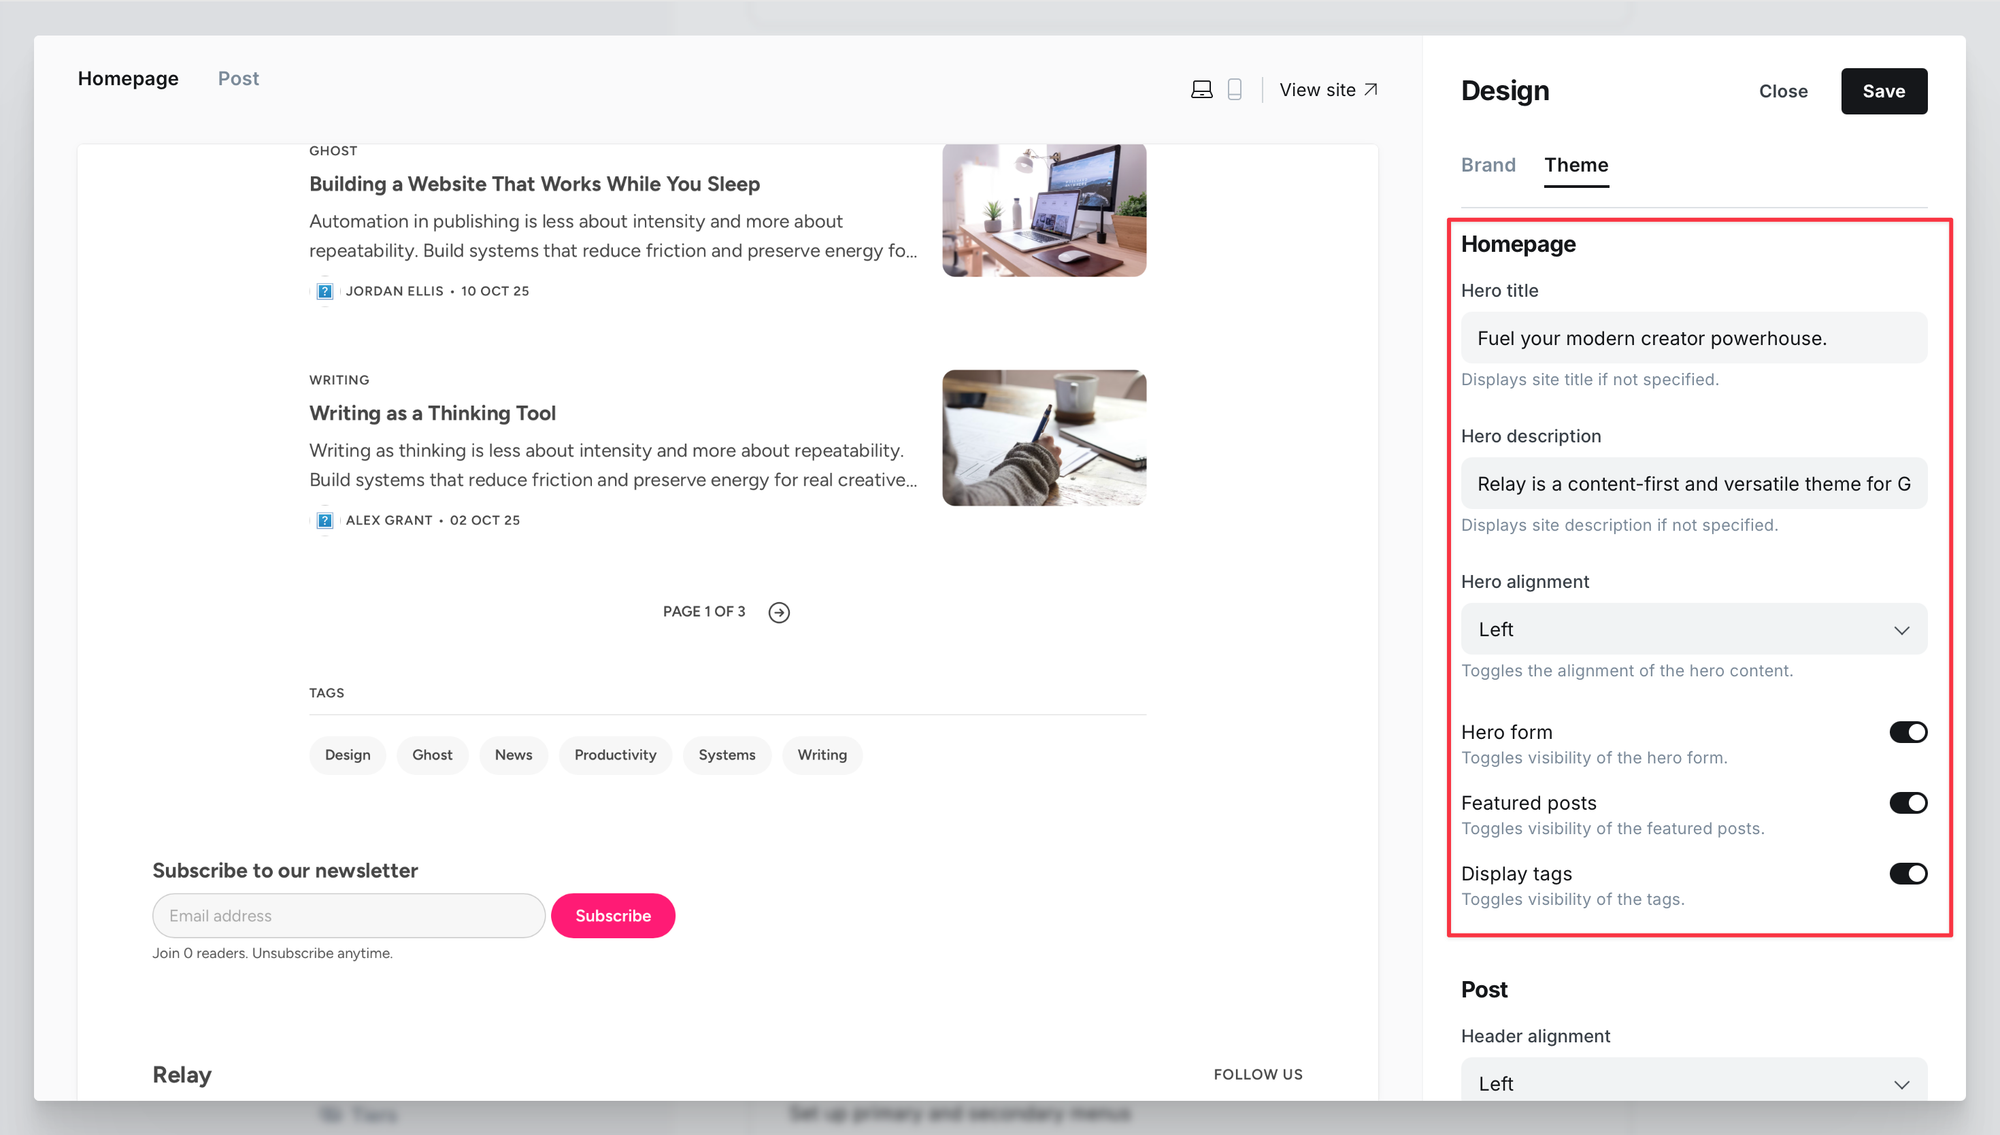
Hero
You can customize the design of the hero with the following settings:
- Hero title: the main title on the homepage, defaults to site title if not specified.
- Hero description: add a custom description, if not, the site description will be displayed.
- Hero alignment: choose either left or center aligned.
- Hero form: toggles the visibility of the form in the hero, regardless of the alignment.
By adding a cover image in the Brand section of the design settings, it will be displayed as the hero's background.
Featured posts
Toggles the visibility of featured posts on the homepage. By turning this off, only the latest posts will be displayed.
Tags
Similarly, you can choose whether you want to display your tags collection on the homepage or not.
Post
This section of custom settings will only apply to your posts, regardless of the post template you choose.
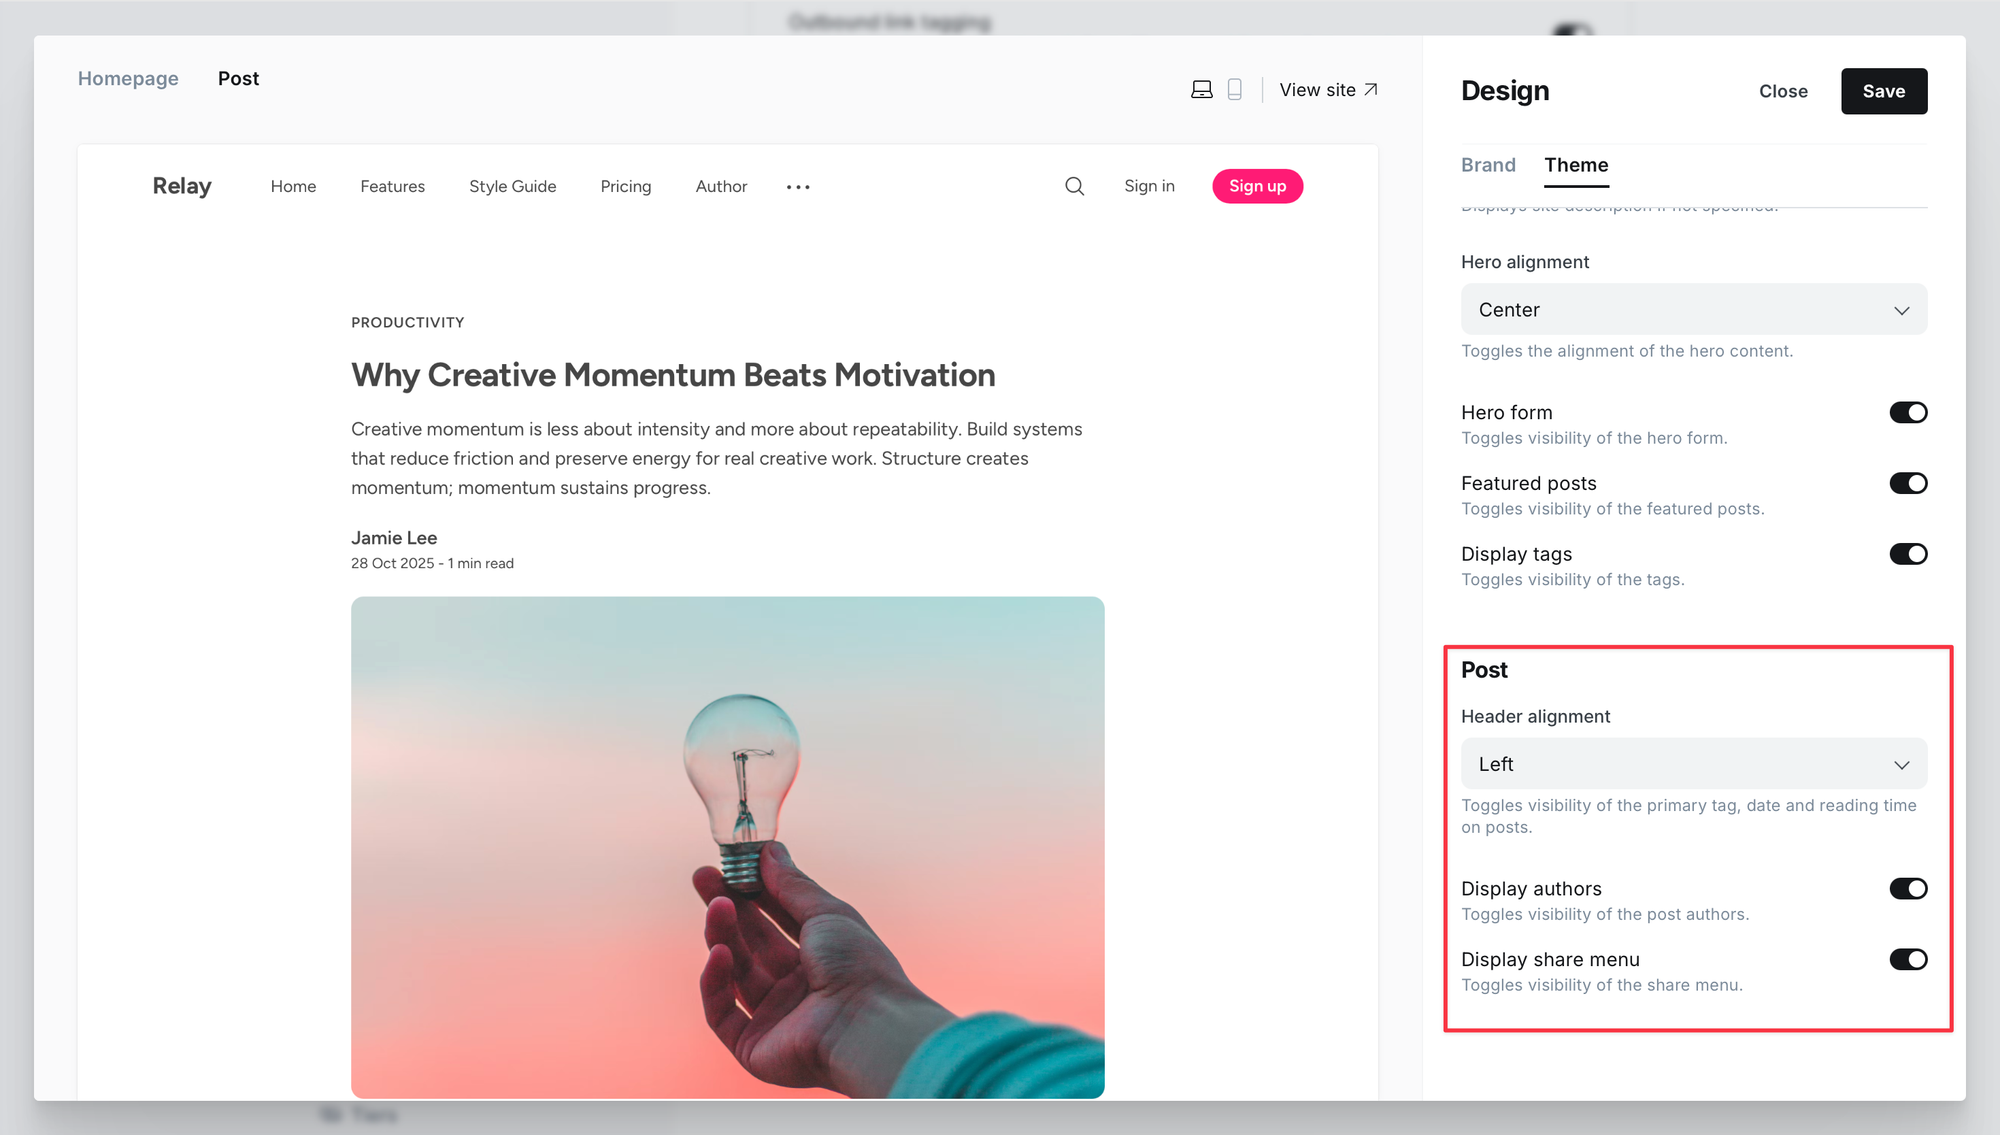
- Header alignment: choose either left-aligned or center-aligned text.
- Display authors: you can display or hide the authors on the post.
- Display share menu: every post has a share menu on the bottom. You can choose to hide it with this setting.
Other design choices depend on your post template of choice.
Navigation
There are two types of navigation that can be used in this theme - primary and secondary.
Primary navigation
Primary navigation will always show up on the top of the website. To customize it:
- Find
Navigationin the settings menu and clickCustomize - Enter the label and its link.
The navbar can show up to 5 navigation items. If there are more, they are moved to a dropdown menu on the right-hand side of the navbar.
Secondary navigation
Secondary navigation will always show up on the bottom of the website in the footer. You can either show social icons or links.
If you decide to show social icons, follow these exact rules to allow the icons to show up:
- Find
Navigationin the settings menu and click Customize. Click theSecondarytab. - Under the label, type the name of the supported social media. The name has to be uncapitalized.
- For example, if you wanted to add your Instagram profile, you would do write
instagramfor the label and provide a link. - Under link, type in the link of your profile.
Facebook and X can be added under General settings → Social accounts. The icons for X and Facebook will automatically show up in the secondary navigation, regardless if you add other items or not.
The supported social media platforms are: Behance, Discord, Flickr, GitHub, Goodreads, Instagram, LinkedIn, Mastodon, Patreon, PayPal, Pinterest, Product Hunt, Reddit, Snapchat, Soundcloud, Spotify, Strava, Telegram, TikTok, Twitch, Unsplash, Vimeo, and YouTube. The icons are provided by Fontawesome.
If you decide to show plain links, you can enter them as you would with the primary navigation.
Custom Templates
When writing a post or page, you can also choose to change its design.
- Open a post or page you wish to edit.
- Open its settings by clicking the button on the top right.
- Find
Templateand open the dropdown menu. - Choose a template

Apart from the default post template, there are 4 custom ones. They differ in the feature image position and size:
- Full Width: the feature image spans the width of the device's screen.
- Image Top: the order is flipped, with the image appearing first and the title, description and author right below it. Additionally, the feature image itself is smaller.
- No Image: feature image is hidden
- Wide: feature image is wider than the content, but narrower than the device's screen.
Table of Contents
The table of contents is always displayed to the left of the text on the post or page. You can add it to any post or page (or any template) you like by adding the #table-of-contents internal tag:
- Navigate to the post you want to display the table of contents on.
- Open its settings.
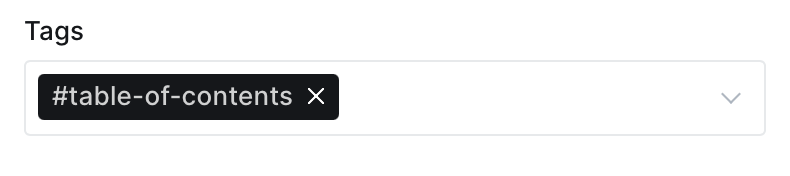
- Add a tag
#table-of-contentsin the tags section.
If you're on a desktop, the TOC on your left is how it looks like and works.
Translations
You can translate the theme from English into your language. These are the steps:
- Unzip the theme and navigate into the
localesfolder. - Duplicate the
en.jsonfile and rename it into a valid language code. For example,de.jsonfor German. - Open the file in a code editor and translate the words and sentences. See example below (translated with ChatGPT). Save the file.
- Compress the theme folder and upload it to Ghost.
- In general settings under Publication language, write the same language code. For Spanish, it’s
de. This will translate the theme to German.
{
    "Account": "Konto",
    "Already have an account?": "Hast du bereits ein Konto?",
    "and": "und",
    "Blog": "Blog",
    "Contents": "Inhalt",
    "Copied to clipboard": "In die Zwischenablage kopiert",
    "Explore": "Entdecken",
    "Featured": "Empfohlen",
    "Go to Home": "Zur Startseite",
    "Home": "Startseite",
    "Join": "Beitreten",
    "Latest": "Neueste",
    "Next Post": "Nächster Beitrag",
    "of": "von",
    "Page": "Seite",
    "Previous Post": "Vorheriger Beitrag",
    "Published with": "Veröffentlicht mit",
    "Read more": "Mehr lesen",
    "readers.": "Leser.",
    "Recent": "Kürzlich",
    "See all": "Alle ansehen",
    "Share this post": "Diesen Beitrag teilen",
    "Sign in": "Anmelden",
    "Sign out": "Abmelden",
    "Sign up": "Registrieren",
    "Subscribe": "Abonnieren",
    "Subscribe now": "Jetzt abonnieren",
    "Success! Check your email to confirm your subscription.": "Erfolg! Überprüfe deine E-Mail, um dein Abonnement zu bestätigen.",
    "Tags": "Tags",
    "The page you are looking for does not exist.": "Die gesuchte Seite existiert nicht.",
    "This post is for paying subscribers only": "Dieser Beitrag ist nur für zahlende Abonnenten",
    "This post is for subscribers on the {{tiers}} only": "Dieser Beitrag ist nur für Abonnenten der {{tiers}} verfügbar",
    "This post is for subscribers only": "Dieser Beitrag ist nur für Abonnenten",
    "Unsubscribe anytime.": "Du kannst dich jederzeit abmelden.",
    "Upgrade your account": "Konto upgraden",
    "Website": "Webseite",
    "Where do you want to go next?": "Wohin möchtest du als nächstes gehen?"
}
For a detailed tutorial, visit this Ghost page.
Customization
Customizing Relay is as easy as using it. There are no compilers or dependencies you need to install. Just open the theme in your favorite code editor and start customizing.
There are 2 ways you can customize this theme.
The first one is by adding code to the code injection section of your Ghost installation. This ensures your changes remain the same even after we update the theme.
The second one is by editing a file called custom.css, which you find in the theme folder in the assets/css. The added CSS will be automatically included in the main CSS file of the theme.
Theme Updates
We regularly update this theme based on customer feedback and when Ghost release new features. When we do, customers get an email notification.
Keep in mind that any customization you do to your theme files will not be updated when we release a new version. You’ll have to do that yourself.
Hosting
We recommend hosting your website with Ghost. You’ll need at least the Creator plan to host a custom theme like this one.