How to Self-Host Ghost With DigitalOcean (Beginner's Guide)
Learn how to self-host Ghost CMS on DigitalOcean from scratch — no prior server experience needed. This guide walks you through every step to get your own publication online, fast.

When I first came across Ghost, self-hosting was a daunting challenge. For a complete beginner having to mess with servers, it's no easy task.
The goal is to allow a complete beginner, without prior experience, to set up a Ghost publication on their own server. Why? Even though Ghost offers a $9/month plan, self-hosting gives you complete control and access to features only available on more expensive plans.
Let's dig in.
What you'll need:
- Domain name
- DigitalOcean account (with credit or billing set up)
- Terminal app (or willingness to use DigitalOcean’s browser terminal)
If you're not sure about Ghost yet, test it out on your computer!

Set Up Your Server on DigitalOcean
The first thing you need to start your server is to actually have it. In this guide, we'll use DigitalOcean, a hosting provider for developers. They offer a wide range of products, but we'll focus on those that are somewhat automated for installing Ghost.
- Set up an account with DigitalOcean. You can use this link to get $200 of credit over 60 days, and once you spend $25, we get $25 in credit.
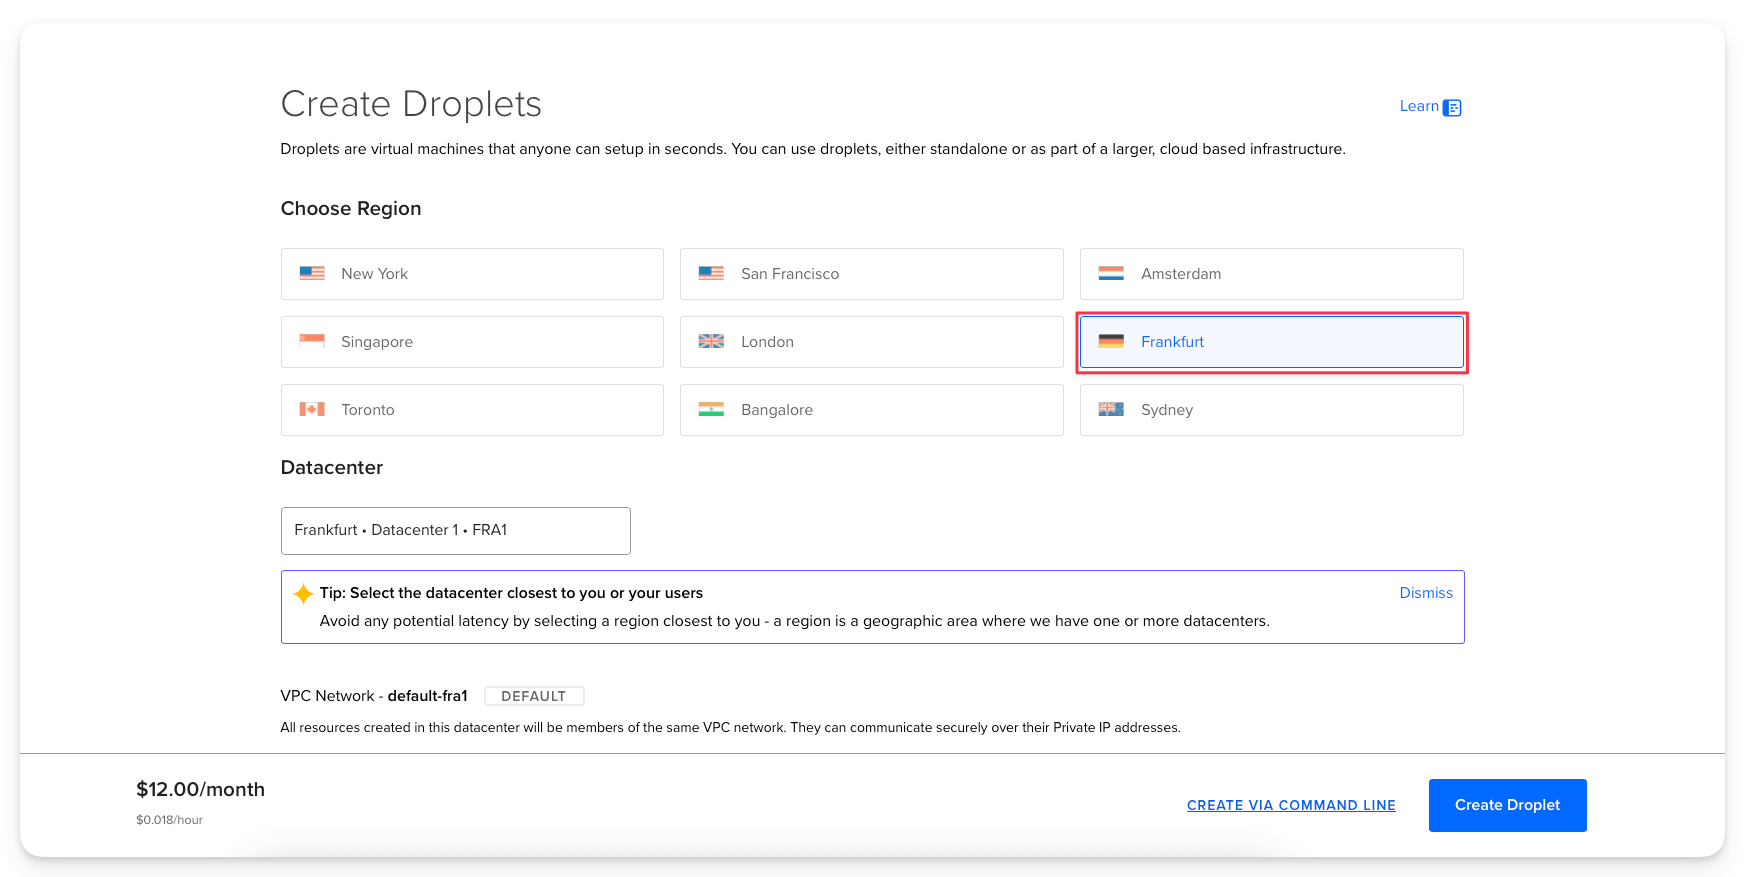
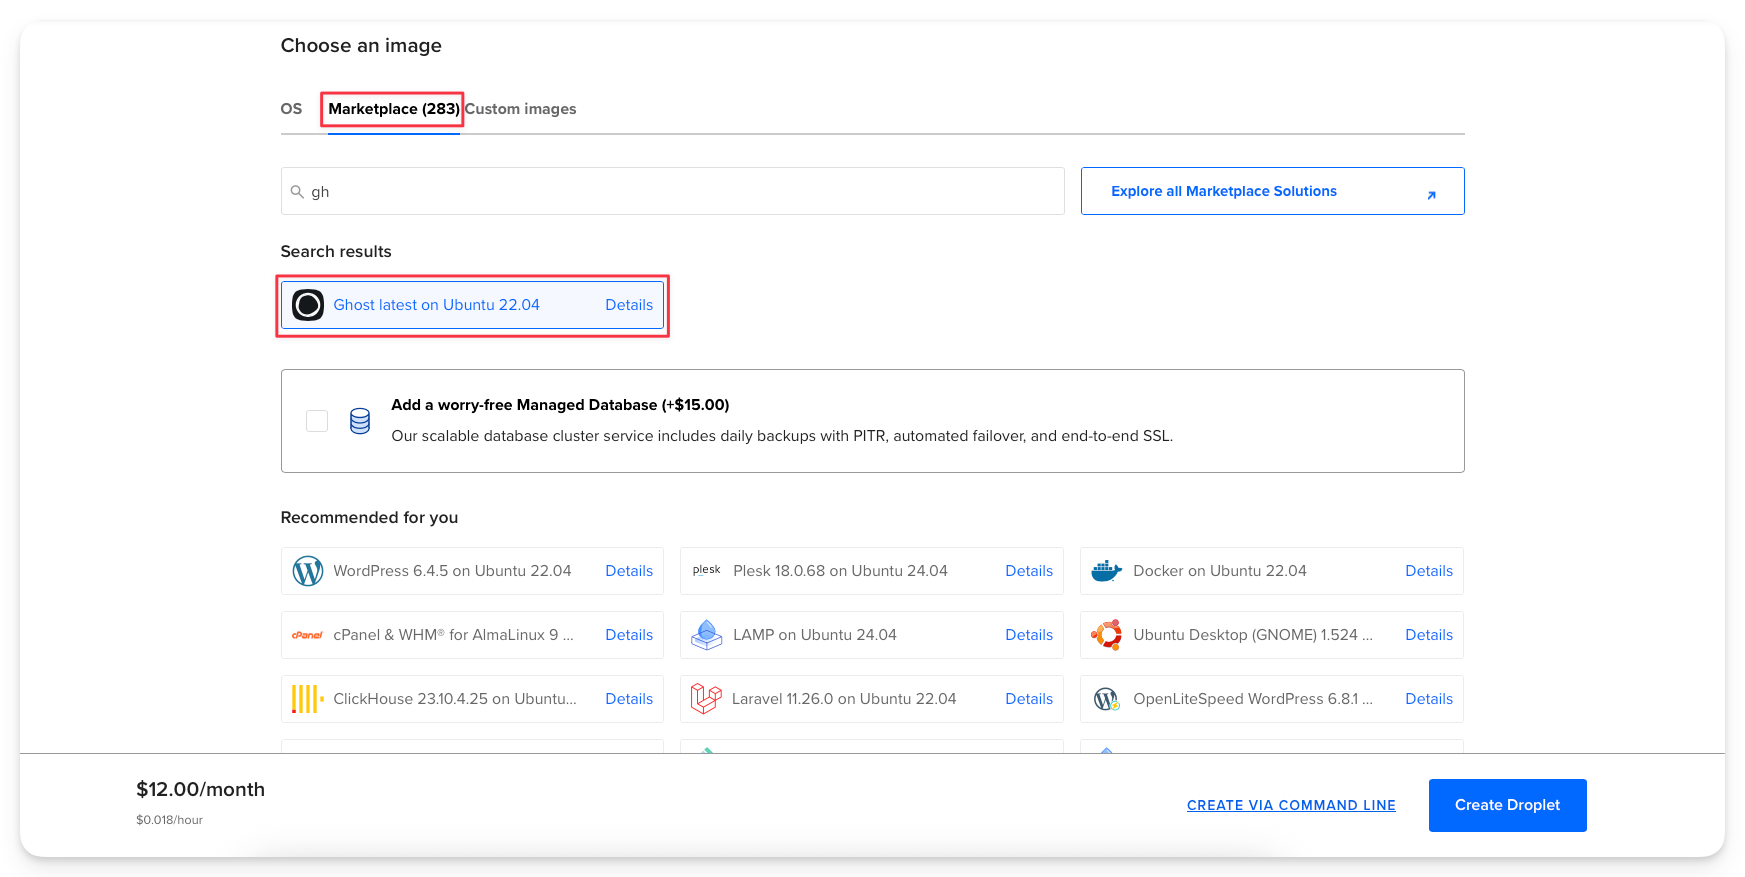
- Choose a prebuilt server image for Ghost called a "Droplet". In your account, click "Create" and choose "Droplet". I recommend selecting a region closest to you. Under "Marketplace", search for Ghost and select it.
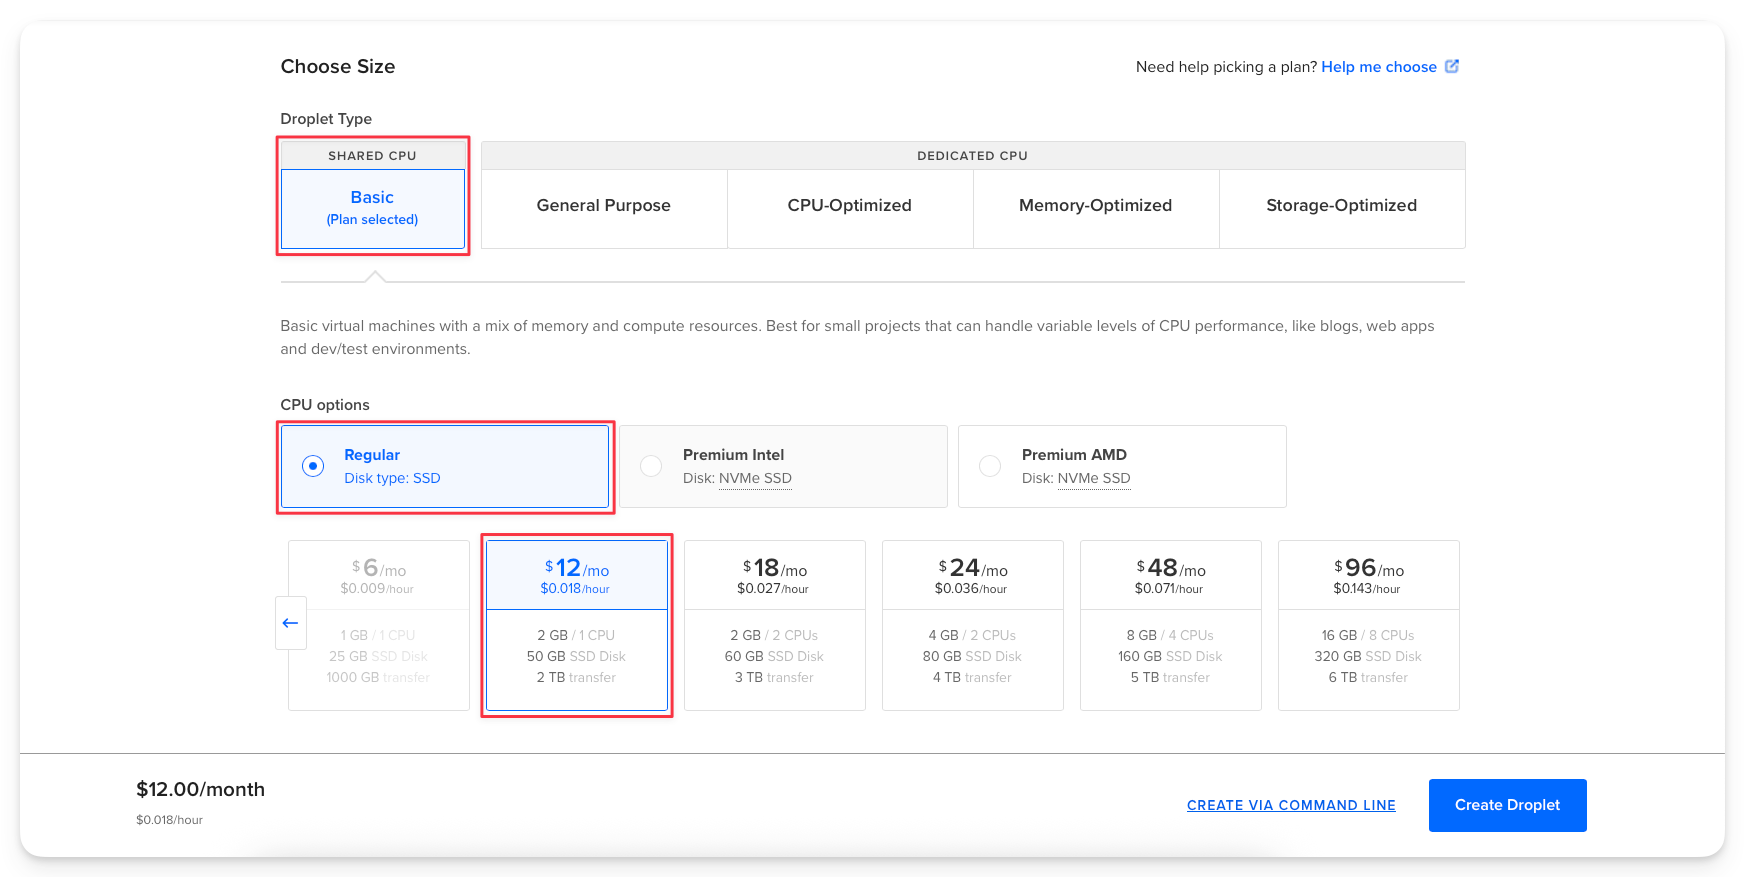
- Choose the most basic plan possible. At the time of writing, that's the $12/month droplet.
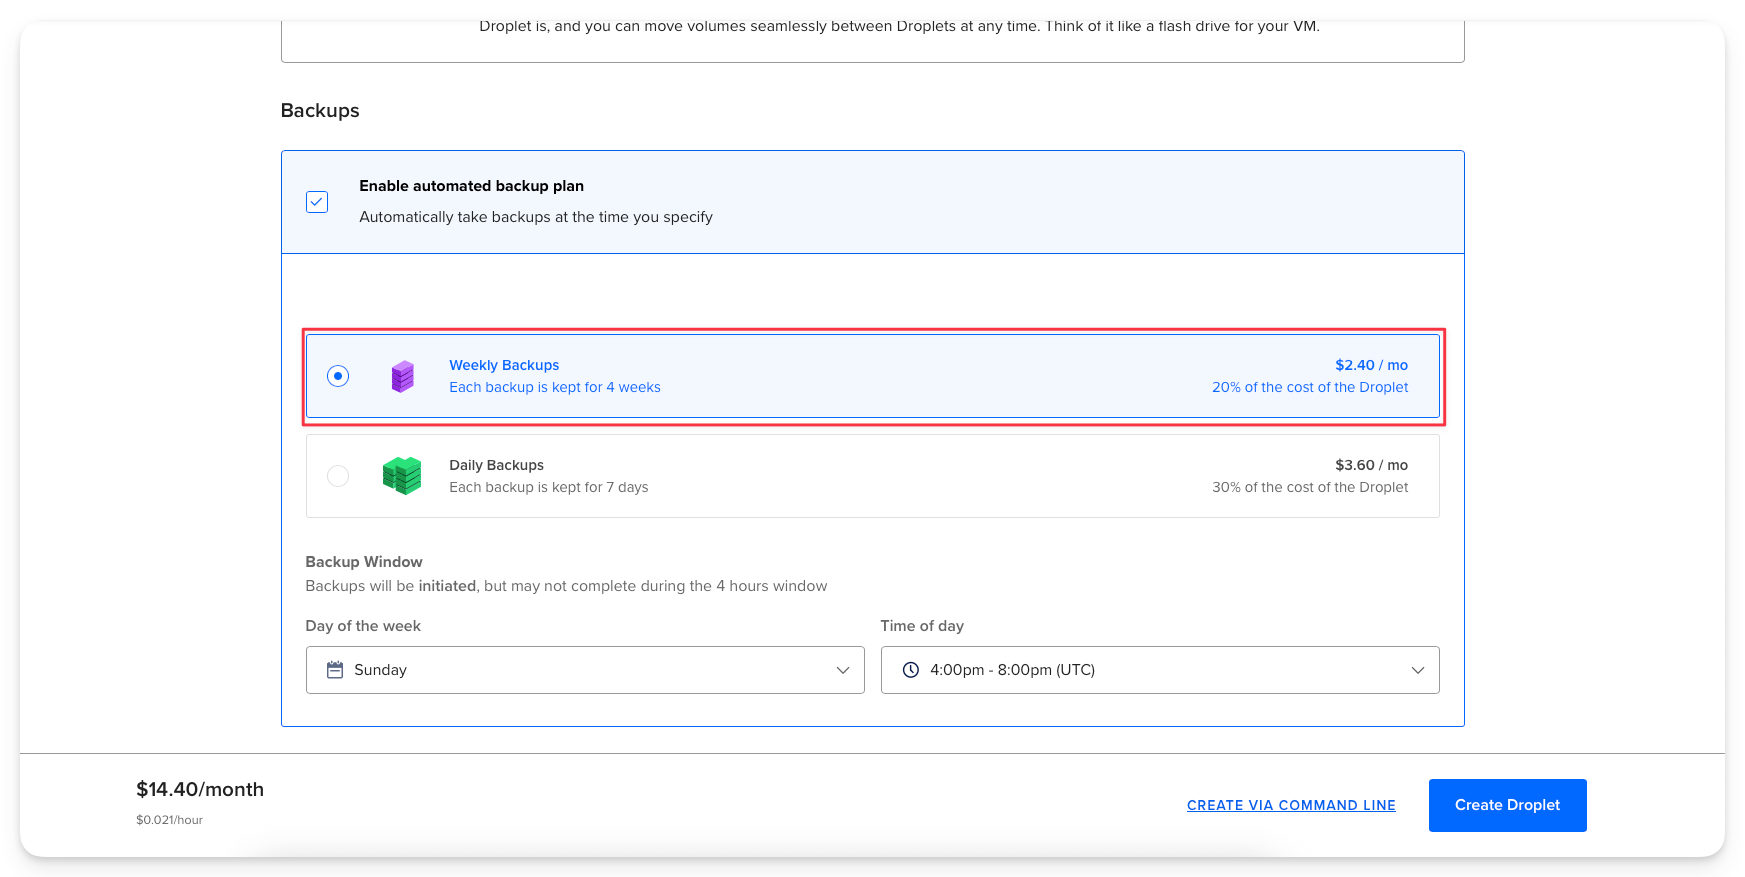
- It's recommended you turn on automatic backups, but not necessary. But in case something goes wrong later, you'll be thankful.
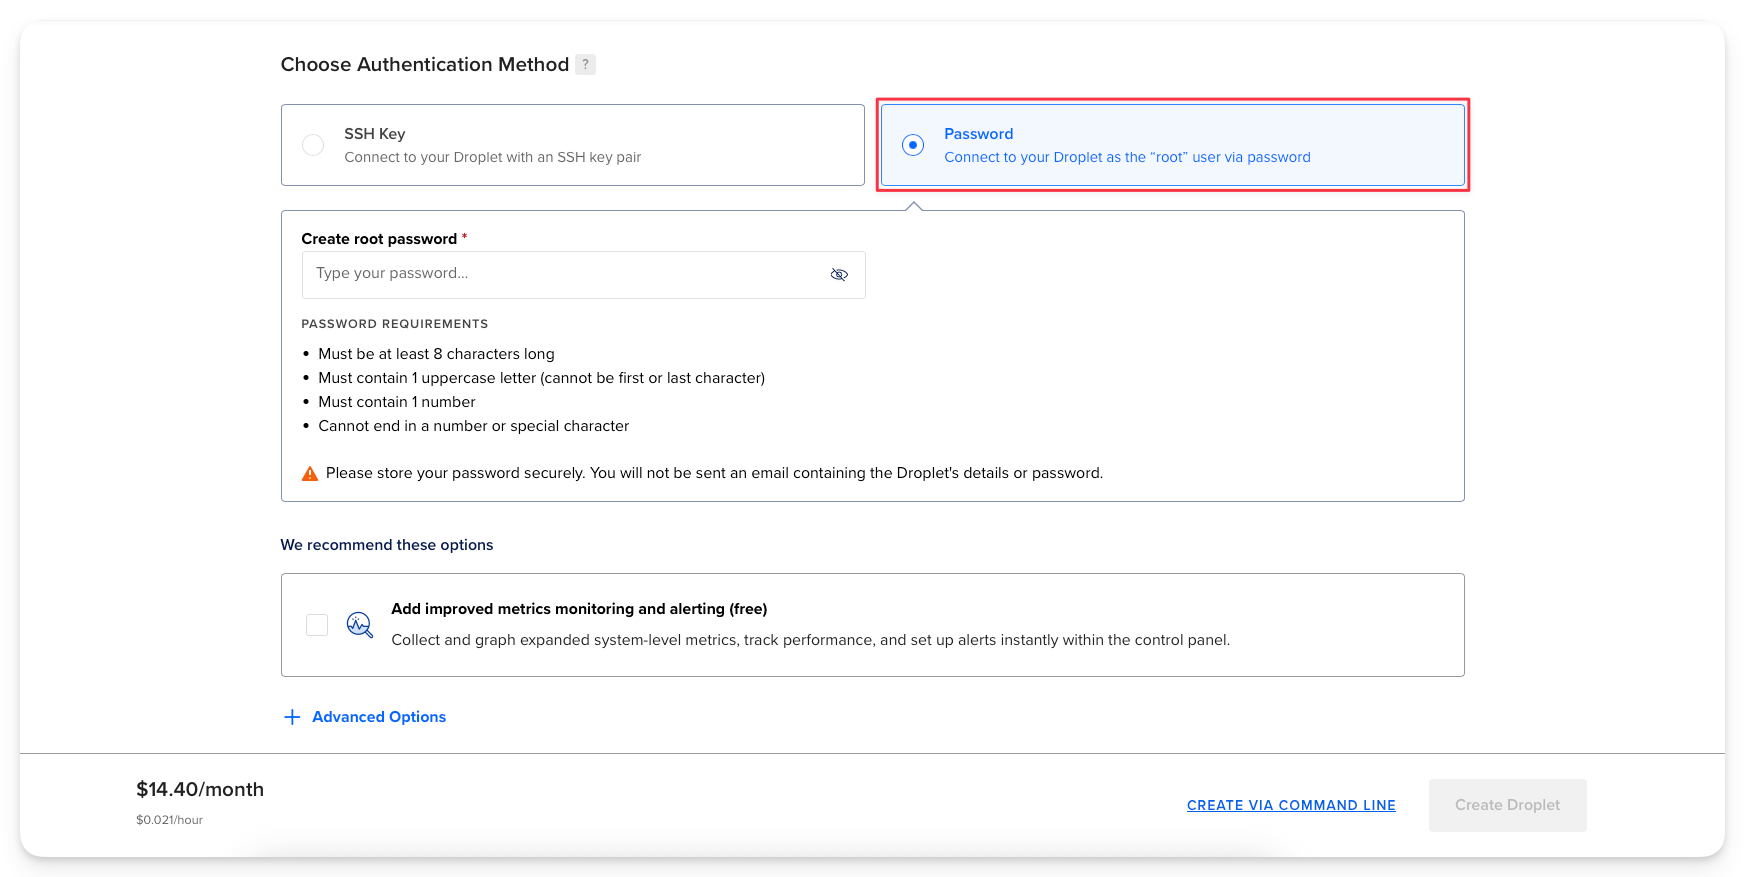
- Either add an SSH key or create a root password. SSH key is generally safer, but you have to create it on your machine first.
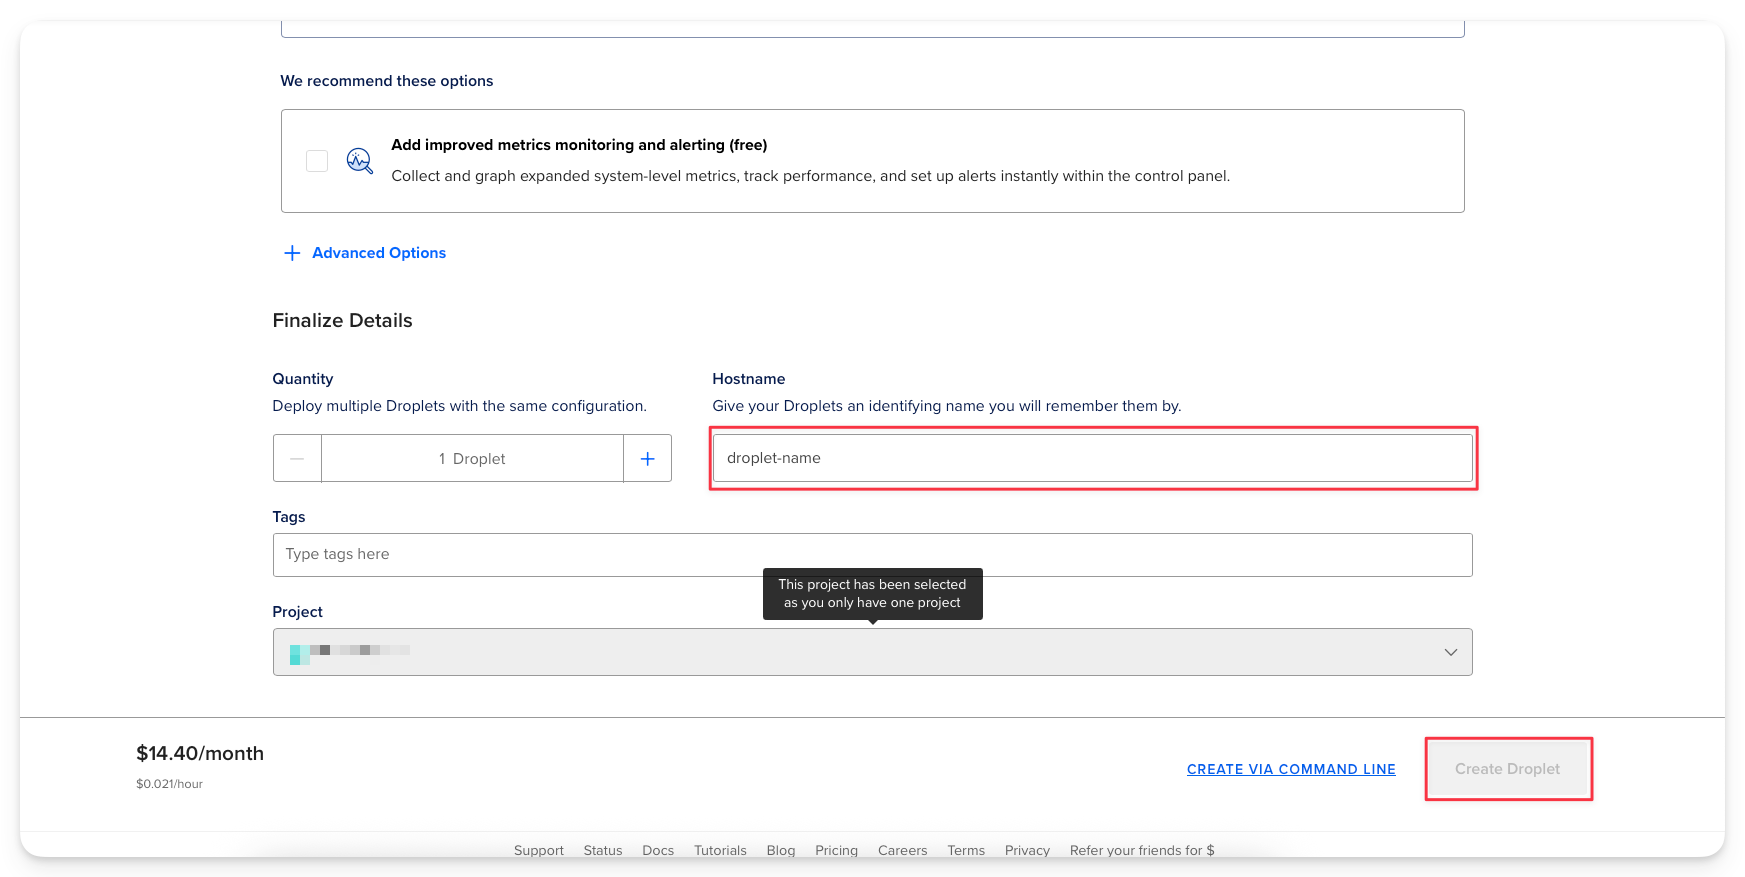
- Name your droplet and click create.
Connect Your Custom Domain
You've completed the first step, now we have to add your domain.
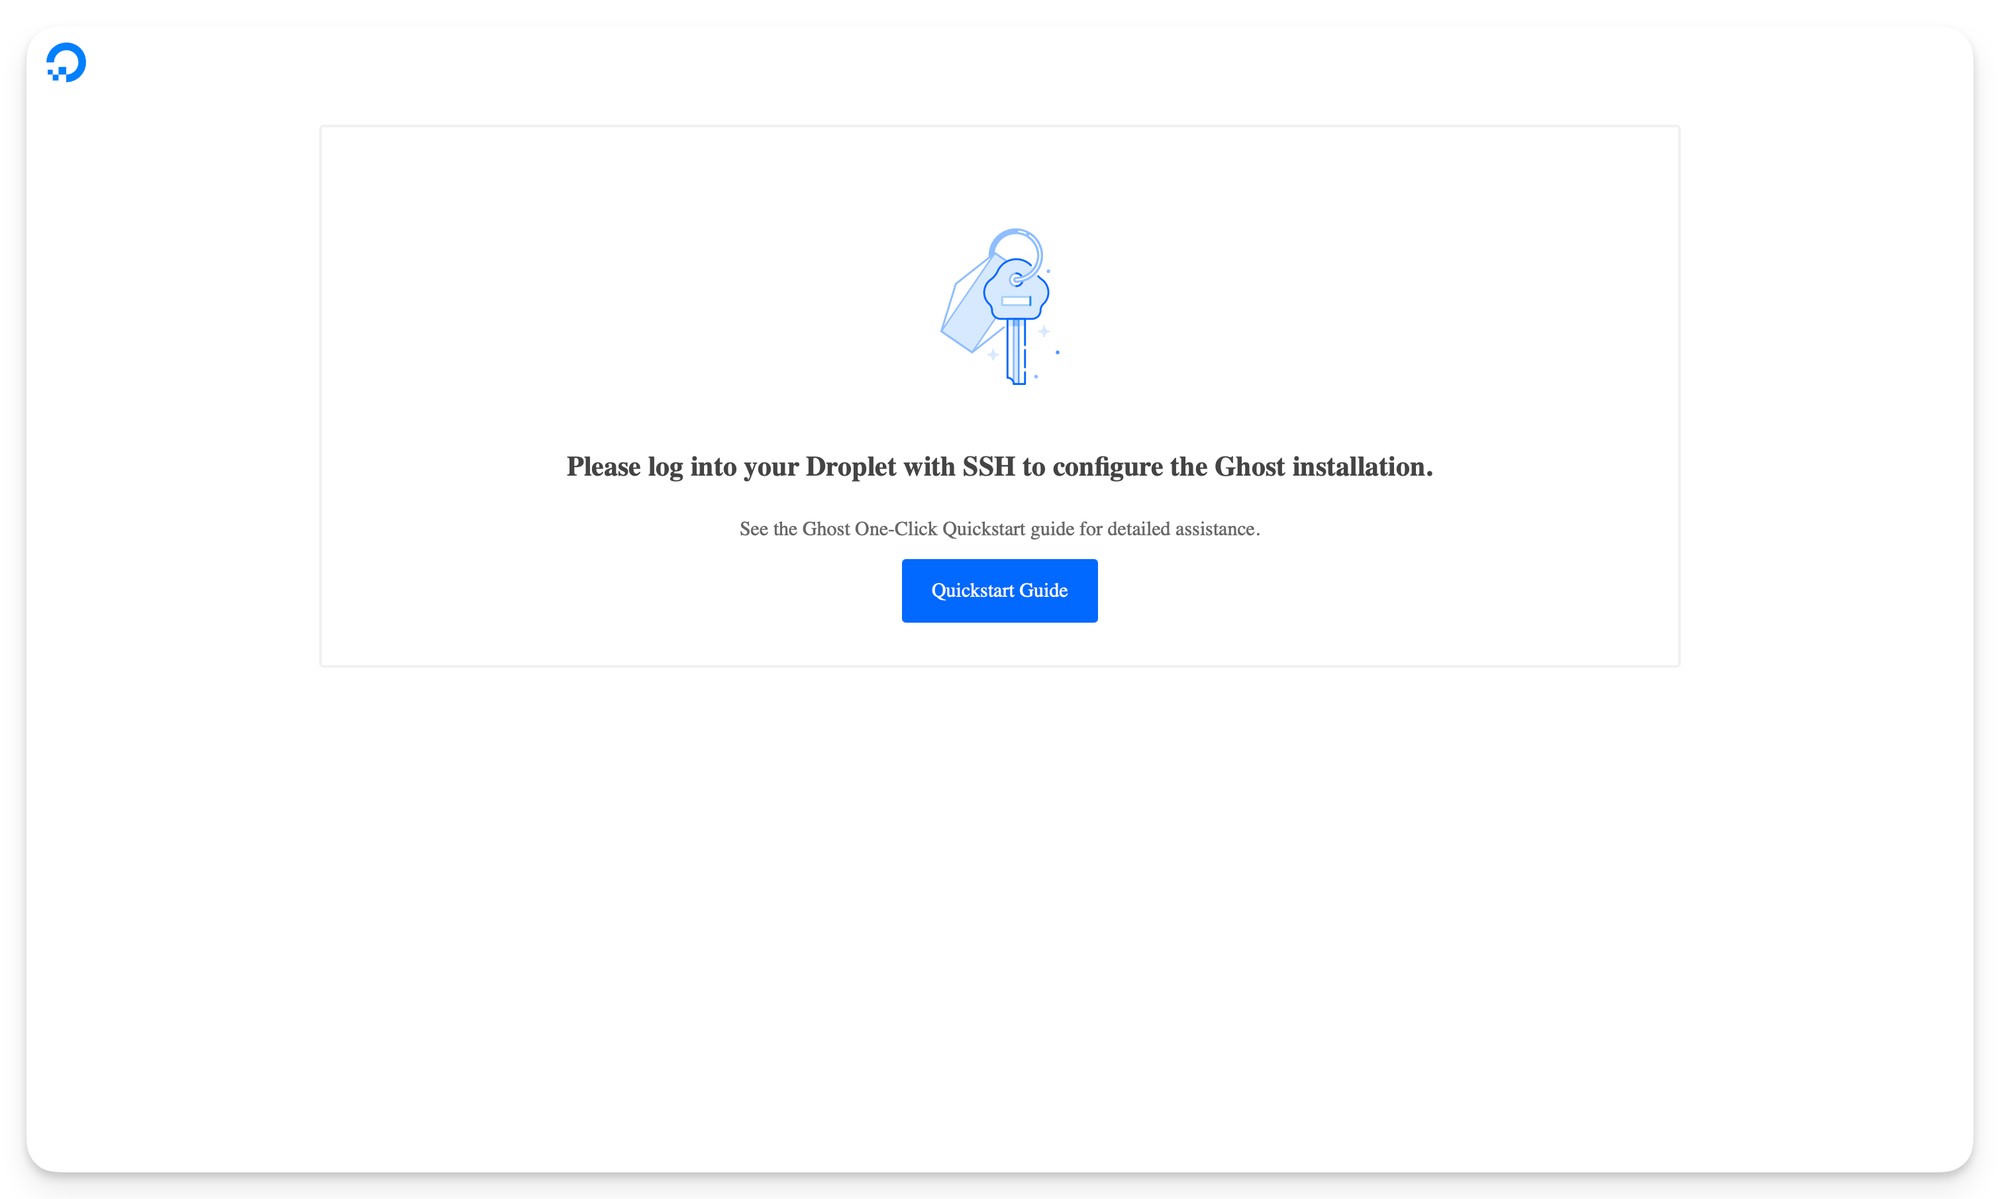
- Copy the IP address of your droplet. You can find it in your DigitalOcean profile and paste it in your browser. You should see this (if not, wait):
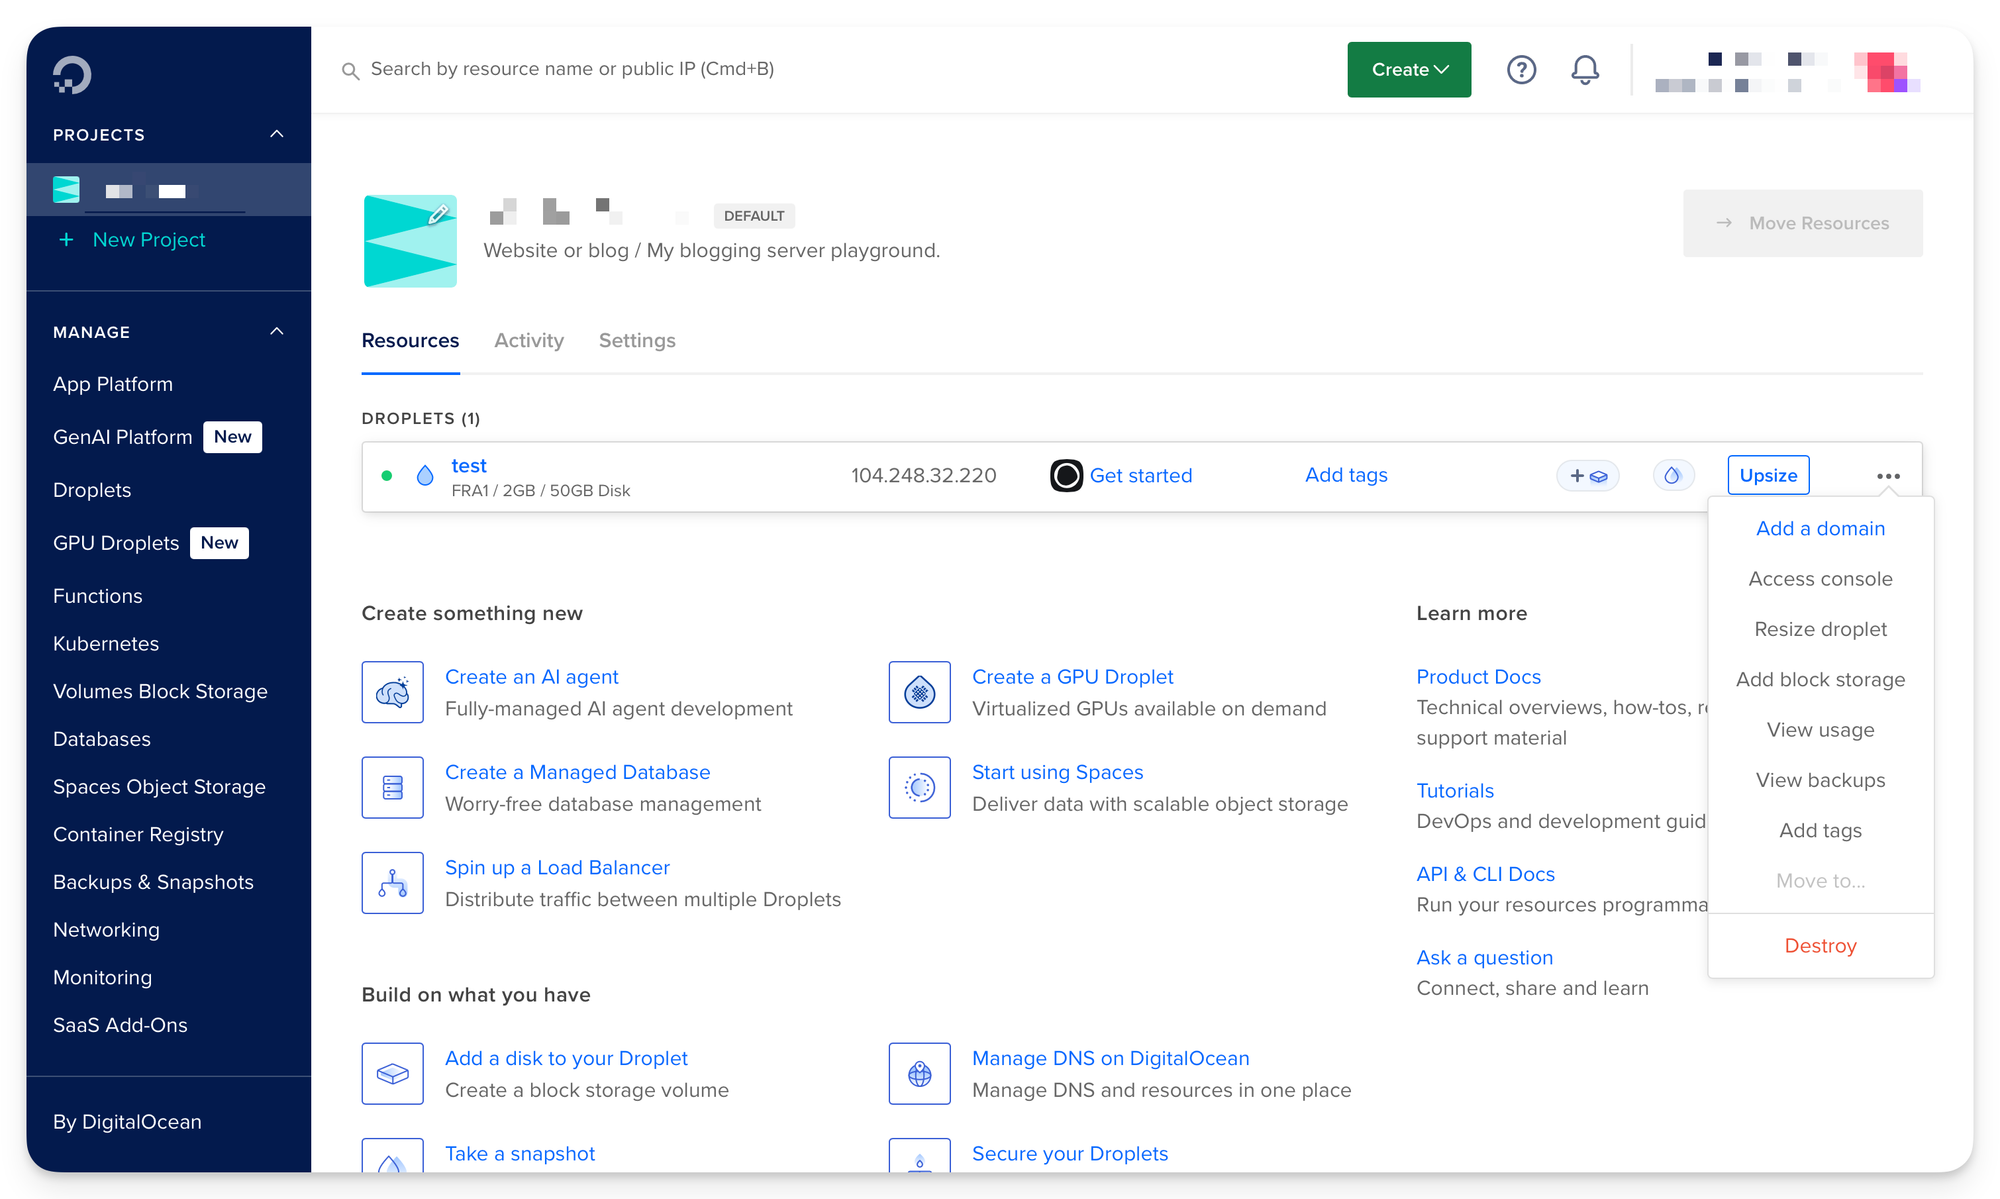
- Now we have to add your domain. Click on the 3 dots next to the droplet name and choose "Add a domain". Then type it in (for example,
yourname.com). This can also be a subdomain, for example,blog.yourname.com. - Click on your domain name. You will see that some DNS records are already created. There, you can see an A record that points your domain to your droplet's IP address.
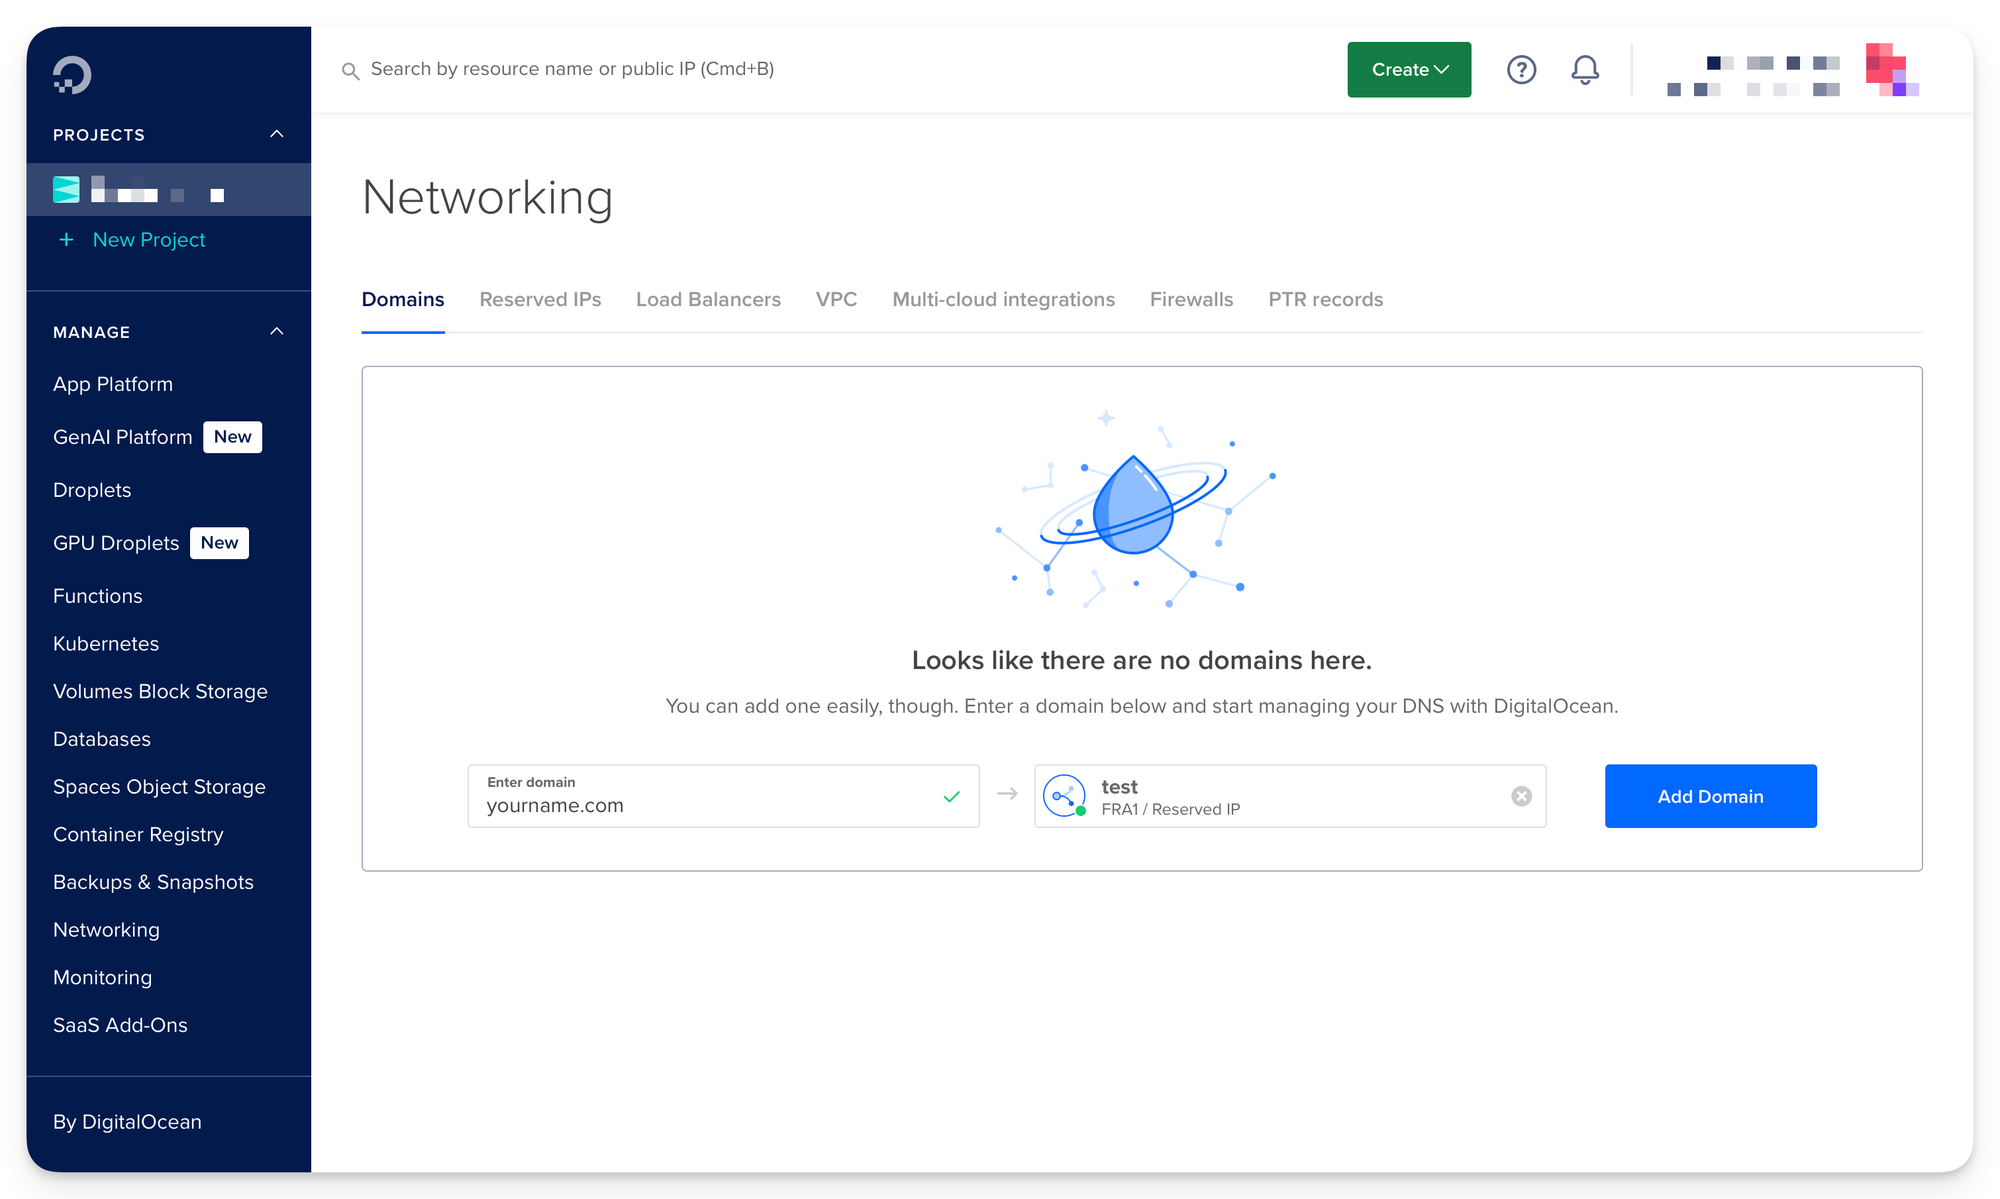
@ as hostname, this will equal to yourdomain.com. If you put in www this will equal to "www.yourdomain.com".- In any case, you need to add an A record to your DNS provider that points to your droplet's IP address. If you use DigitalOcean for this, the work is already done for you. For external DNS providers, you have to add one.
- Once you complete the steps above, type in your domain into your browser. It could take a couple of minutes, but once it propagates, you should see the same page as we did when we navigated to our IP address.
Learn the basics of domain management in our guide below.

Run the One-Click Ghost Installer
Now we have everything in place for starting the automatic Ghost installation. It might be daunting for absolute beginners, but this chapter will guide you through every step you need to take.
You can either use DigitalOcean's in-browser terminal to do this, or the one on your computer, which generally works better. The steps are exactly the same for both.
- Log into your droplet using your terminal or command line and SSH. Enter the password you chose when buying the droplet.
# SSH into your droplet
ssh root@droplet_ip_address

# When prompted, type in your password and press enter- Press enter to begin installation and it will start automatically.
- When it's finished, you'll have to specify your domain. Type in your non-www domain like this:
yourname.com- Next, enter an email address when prompted for your SSL certificate, which is 100% free from Let's Encrypt.
This is it, you are done, my friend!
Before you continue, navigate to your domain in your browser and check that everything is working. Add /ghost to your URL, create an account and set up your website.
Secure & Configure Your Ghost Installation
The website should now be working. But to ensure Ghost is working properly, we have some more work to do.
Since Ghost CLI 1.5.0 you cannot run ghost commands as the root user or ghost-mgr. We have to create a new user and give it appropriate permissions. You should still be logged into your terminal as the root user.
- Create a new user and fill in the required data (you really only need the password):
adduser user- Give the new user sudo (like administrator) permissions:
usermod -aG sudo user- Move the config file to your new user folder:
# Make a .ghost directory in your user's folder
mkdir -p /home/user/.ghost/

# Change ownership of that folder
chown user:user /home/user/.ghost

# Move the config file from ghost-mgr to your new user
mv /home/ghost-mgr/.ghost/config /home/user/.ghost/config

# Change ownership of that config file
chown user:user /home/user/.ghost/config

# Change into Ghost installation
cd /var/www/ghost

# Execute this command
find . -group root -user root -exec chown user:user {} \;

# Switch user
su - user- Now we have to change the ownership of the most important folders and files, so you can operate smoothly with Ghost. You have to run commands with "sudo" in front:
# Change ownership of the config.production.json file
sudo chown user:user /var/www/ghost/config.production.json

# Change ownership of the .ghost-cli file
sudo chown user:user /var/www/ghost/.ghost-cli

# Change ownership of the Ghost folder files
sudo chown user:user /var/www/ghost/

# Change ownership of the Ghost versions folder
sudo chown user:user /var/www/ghost/versions

# Navigate to /var/www/ghost
cd /var/www/ghost

# Execute this line
sudo find ./ -type d -exec chmod 00775 {} \;- That should do it. Just make sure you're meticulous with what you write in the terminal. Now try restarting and updating Ghost to see if everything is working as it should be.
Keeping Your Ghost Updated
The only thing you really need to manage the server is knowing how to update Ghost CLI and Ghost. It's simple.
- To update Ghost CLI as your newly created user, SSH into your droplet like above and make sure you're not in your Ghost installation folder (remember how we installed Ghost CLI on our local computer).
# Update Ghost CLI

sudo npm install -g ghost-cli@latest- Ghost updates are pretty regular, so you should just try and update it every few days or weeks. To update Ghost, you have to navigate into the folder where it's installed and execute this line:
# Navigate into Ghost folder
cd /var/www/ghost

# Update Ghost
ghost update
Summary
- Create a DigitalOcean account with this link to get $200 of credit over 2 months. Choose the least expensive droplet and turn on backups.
- Add your domain and configure DNS records to manage everything in one place.
- Ghost will install automatically on this droplet, so you just need to configure it.
- Create a new user and give it the correct permissions. Make sure to be meticulous with what you write. Choose the non-www domain as the main one.
- Learn to update Ghost CLI and Ghost.